
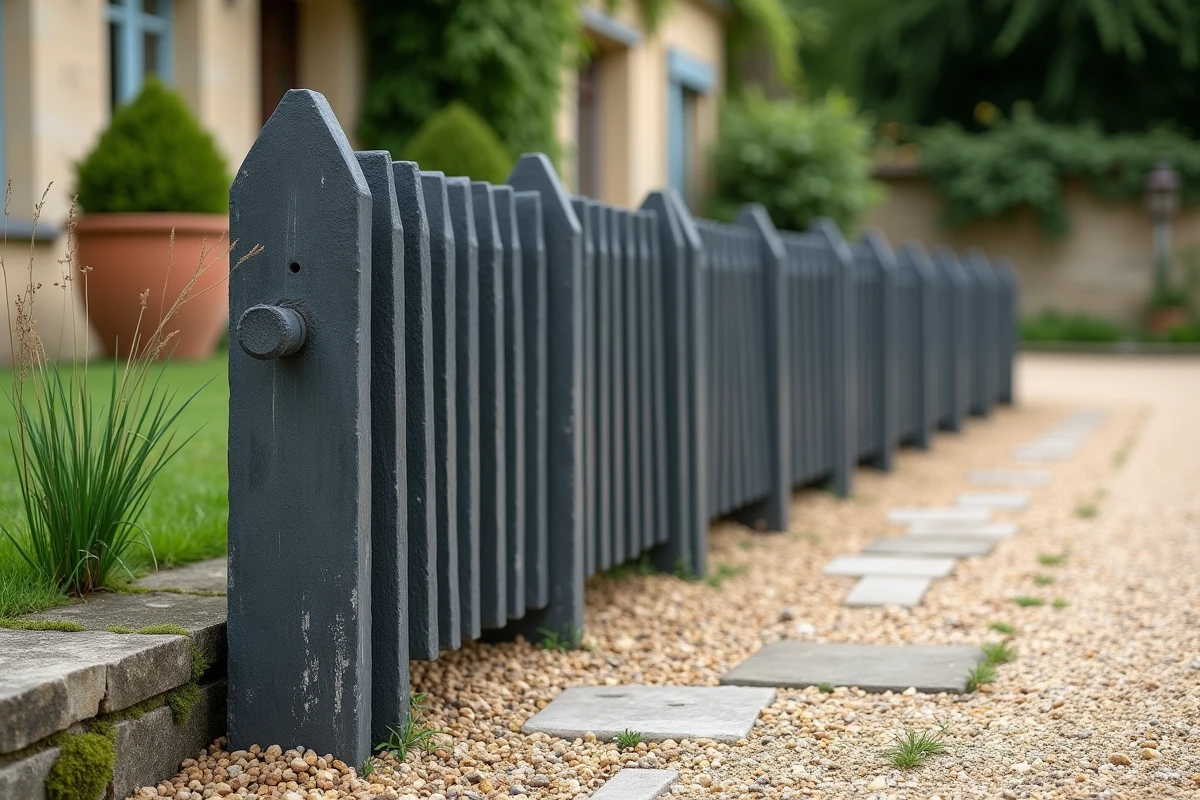
The schist stake is a natural rock slab, cut into a narrow section, used when planted in the ground to border, fence, or structure a massif. Its installation relies on three precise technical parameters: ground preparation, anchoring depth, and lateral support. If not mastered, these parameters can lead to stakes that topple after a few months or break immediately upon installation.
Fragility of schist to shock: a parameter that conditions the entire installation
Concrete or wooden borders withstand blows from a mallet without flinching. Schist, on the other hand, is a layered rock. A poorly oriented impact, perpendicular to the layers, causes a clean break. This behavior requires that you never force a stake into hard ground with a standard mallet.
Read also : Guide to Choosing the Ideal Harness for Canicross: Criteria and Practical Tips
To drive a stake without breaking it, always insert a softwood wedge between the mallet and the edge of the stake. A piece of batten or a scrap of board is sufficient. The wedge absorbs the shock and distributes the force over a larger surface than the edge of the rock.
Transport deserves the same attention. Store the stakes upright, wedged against each other, never stacked flat over a long span. A schist slab placed between two distant supports will break under its own weight if it exceeds a certain length. By following these tips for installing schist stakes, you will find that handling is the primary source of material loss on a garden site.
You may also like : What are the rates for nursing homes in Morocco and how to plan your budget?
Preparing the ground before planting schist stakes
A loose and homogeneous soil simplifies everything. But the reality of a garden is often a mix of topsoil, pebbles, and sometimes compact clay. Adapting the method to the type of soil avoids unpleasant surprises.
Loose or sandy soil
Mark your installation line with a taut string between two temporary stakes. Dig a continuous trench with a spade, slightly wider than the thickness of the stake. The depth of the trench should be about one-third of the total height of the stake: this is the buried part that ensures stability.
Hard or stony soil
Installation articles often remain vague on this case. A stony soil requires a pre-trench with a pick or pry bar, or even pre-drilling with a lightweight chisel if you encounter a layer of compacted fill. Attempting to plant a stake directly into stony soil leads to almost systematic breakage.
If the ground contains many nearby tree roots, clear them with a saw rather than pulling them out: a pulled root destabilizes the soil around the trench.
Anchoring and support: the technique for stable schist stakes
Once the trench is opened and the stakes are positioned, the support is the decisive step. Two methods coexist depending on the level of solidity desired.
Support by gravel compaction
This is the most common method for a massif border or a path delimitation. Place the stake in the trench, check its plumb with a level, then fill in with successive layers of fine gravel or coarse sand. Each layer should be firmly compacted with the handle of a tool or a tamper.
- Pour the gravel in layers of a few centimeters, not all at once, to ensure homogeneous compaction around the stake.
- Keep the stake perfectly vertical during filling, temporarily supporting it with flat stones if you are working alone.
- Finish filling slightly above the ground level to anticipate the natural settling of the first weeks.
Sealing with mortar for fences
For a privacy screen or a schist stake fence exposed to the wind, simple gravel support is not enough. A lean mortar (with a minimal amount of cement) poured at the bottom of the trench for a few centimeters locks the base of the stake. Allow it to dry before filling the rest with gravel.
Never completely encase the stake in concrete. Schist expands and contracts with temperature variations. A rigid seal along the entire buried height creates stress points that eventually crack the rock.

Schist or slate: choosing the right material for your garden
The terms “schist” and “slate” are often used interchangeably in outdoor material catalogs. In practice, the visual appearance and resistance differ depending on the rock and its finish.
Roofing slate, very thin and smooth, offers a regular appearance but proves to be more brittle in thin sections. Raw schist, with a textured surface and irregular edges, tolerates light shocks better and gives a more rustic appearance. For a low massif border, both are suitable. For a tall fence exposed to the elements, prefer a schist of sufficient thickness with cut ends that facilitate alignment.
Color also varies: schist ranges from bluish gray, brown, to dark green depending on the quarry of origin. Request a sample before ordering a full batch, as online photos do not always capture the actual hue once the material is wet from rain.
Maintenance of schist stakes after installation
Once installed, schist stakes require little intervention. Moss and lichen eventually colonize the surface, especially in shaded areas. Some appreciate this natural patina. For those who prefer the raw look, a brushing with a stiff brush once a year is sufficient.
Check the plumb of your stakes every spring. Freeze-thaw cycles slightly shift the soil, especially in clayey terrain. A stake that begins to lean can be easily re-leveled by adding gravel at the base, provided you intervene before the movement intensifies.
Installing a geotextile fabric at the bottom of the trench, under the support gravel, limits the rise of weeds along the base of the stakes. This detail reduces long-term maintenance, especially for gravel path borders where vegetation tends to infiltrate between materials.